 biuro@elektrobim.pl
 91 817 14 69


How we adjust the limit switches in the Super Power Jack actuators
To adjust the limit switches in the Super Power Jack actuator, you will need a small screwdriver. In the following article, we will show you how to do this
I. Remove the casing and connect the actuator to the control unit of the limit switches
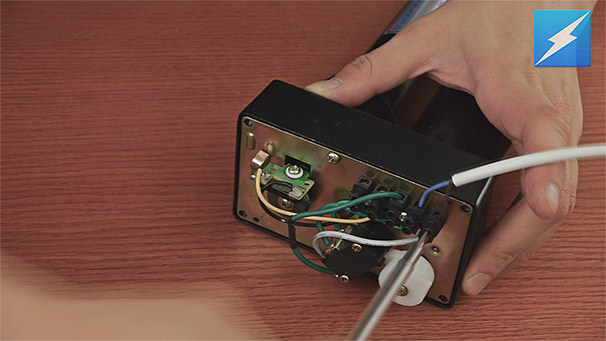
For your safety, we recommend performing this step with the power cut off. In the video, we used a two-channel control unit to connect the actuator. The connection diagram is in Appendix 2. After connecting the actuator, turn on the power supply in accordance with the actuator version.
II. Adjusting the lower limit switch (start position)
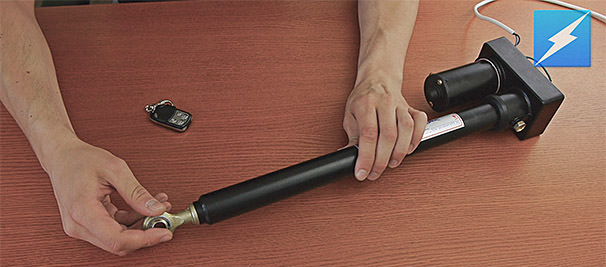
The lower limit switch is adjusted by manually twisting the actuator tube. We should turn it downwards until we feel resistance. At this point, the limit switch is not yet closed. We have to let it go back to its position with the actuator twisted. For this purpose, we turn on the actuator. As the actuator tube has already reached the minimum stroke condition and the limit switch has not yet reached it, it will rotate around its axis until it is turned off by reaching the lower limit switch. From now on, the actuator will always stop in this position. If we want our starting point to be slightly higher, at this point it is enough to manually unscrew the cylinder tube to the preferred position. From now on, the actuator will always stop in this position.
III. Top limit switch adjustment (stop / target position)
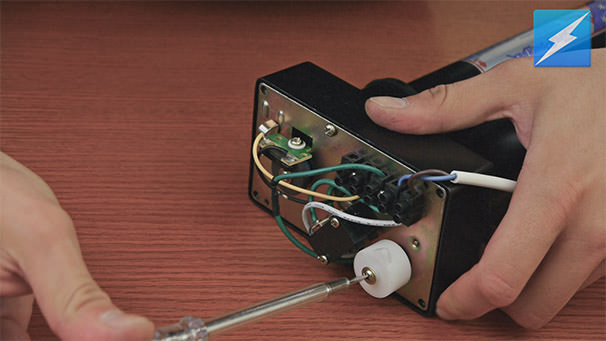
We always start this step from the actuator’s starting position and with the actuator connected to the control unit. To start, we start the actuator and extend it to the preferred target position. If you want the actuator to always stop in this position, just loosen the screw of the limit switch and manually set the contact mode (as shown in the movie). At this point, it is worth setting it precisely and properly tighten the screw to ensure stable operation.
Congratulations, this is how you have managed to adapt the actuator to your needs.


